
home-staging-guide-for-better-property-photography-expert-tips-to-make-your-listings-shine

Staging is one of the most powerful levers in real estate photography — it shapes how buyers feel the moment they see a listing. When you prepare a home for photos with intention, you boost its curb appeal, create a welcoming mood, and make each room photograph better. This guide brings together practical, expert staging tips: from decluttering and furniture layouts to lighting, virtual staging, and local Brisbane insights. If sellers often struggle to present their homes well, these strategies will help them showcase properties clearly and attractively. We’ll cover essential staging steps, lighting setups, furniture arrangements, virtual staging options, market-specific advice, and when to get a pro consultation.
The objective of staging for photography is not to create a show home but to create a clear, aspirational canvas that helps buyers visualise themselves living in the space. Every choice — from a single cushion to where a lamp sits — affects how images read online. Thoughtful staging reduces distractions, emphasises usable space, and makes important features like views and finishes more prominent in photos. Use this guide as a practical checklist and reference you can adapt to different property types, budgets and timelines.
Good staging highlights a home’s strengths and helps buyers picture themselves living there. Focus on clarity, balance and a welcoming feel. Below are straightforward steps that make a real difference in photos:
A checklist keeps the process efficient and ensures nothing is missed before the photographer arrives. Build a short, actionable list you can follow room by room.
Working through these priorities will streamline staging and help your photos feel cohesive and polished.
To make the checklist practical, set a staging timeline. For example:
Assign simple responsibilities if multiple people are involved (owner, agent, stager, cleaner) and keep a short printable version for the photographer so they know the intended flow and focal points in each room.
Decluttering and deep cleaning set the foundation for excellent photos. Simple, targeted actions create the impression of space and care.
These steps help rooms photograph larger, brighter and more inviting.
Room-by-room practical targets:
Small investments — like new towels, a fresh doormat or a vase — often deliver strong visual returns for minimal cost. Make choices that are reversible and inexpensive to implement.
Lighting is the single biggest technical factor that changes how a property looks in photos. Thoughtful light control highlights textures, defines space and adds warmth that appeals to buyers.
Use these lighting approaches to produce clean, attractive images:
Applying these techniques consistently will lift the overall look and feel of property photos.
Practical lighting checks before a shoot:
Photographers may use additional fill lights or reflectors to balance shadows, but starting with well-considered in-room lighting reduces post-processing and produces more natural, appealing images.
Mixing natural and artificial light lets you control contrast and emphasize architecture, finishes and views.
Balancing both light sources ensures rooms look bright, balanced and welcoming in images.
Tips to emphasise features using light:
When preparing a property, consider temporary lighting adjustments (floor lamps, portable LED panels) that can be easily removed after the photography session. These small additions often resolve common issues like dark corners or uneven exposures.
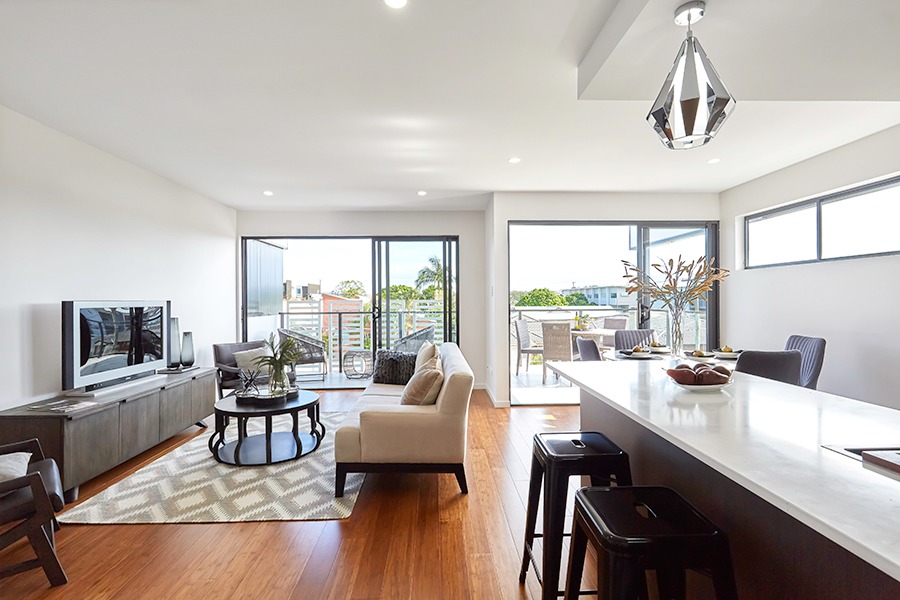
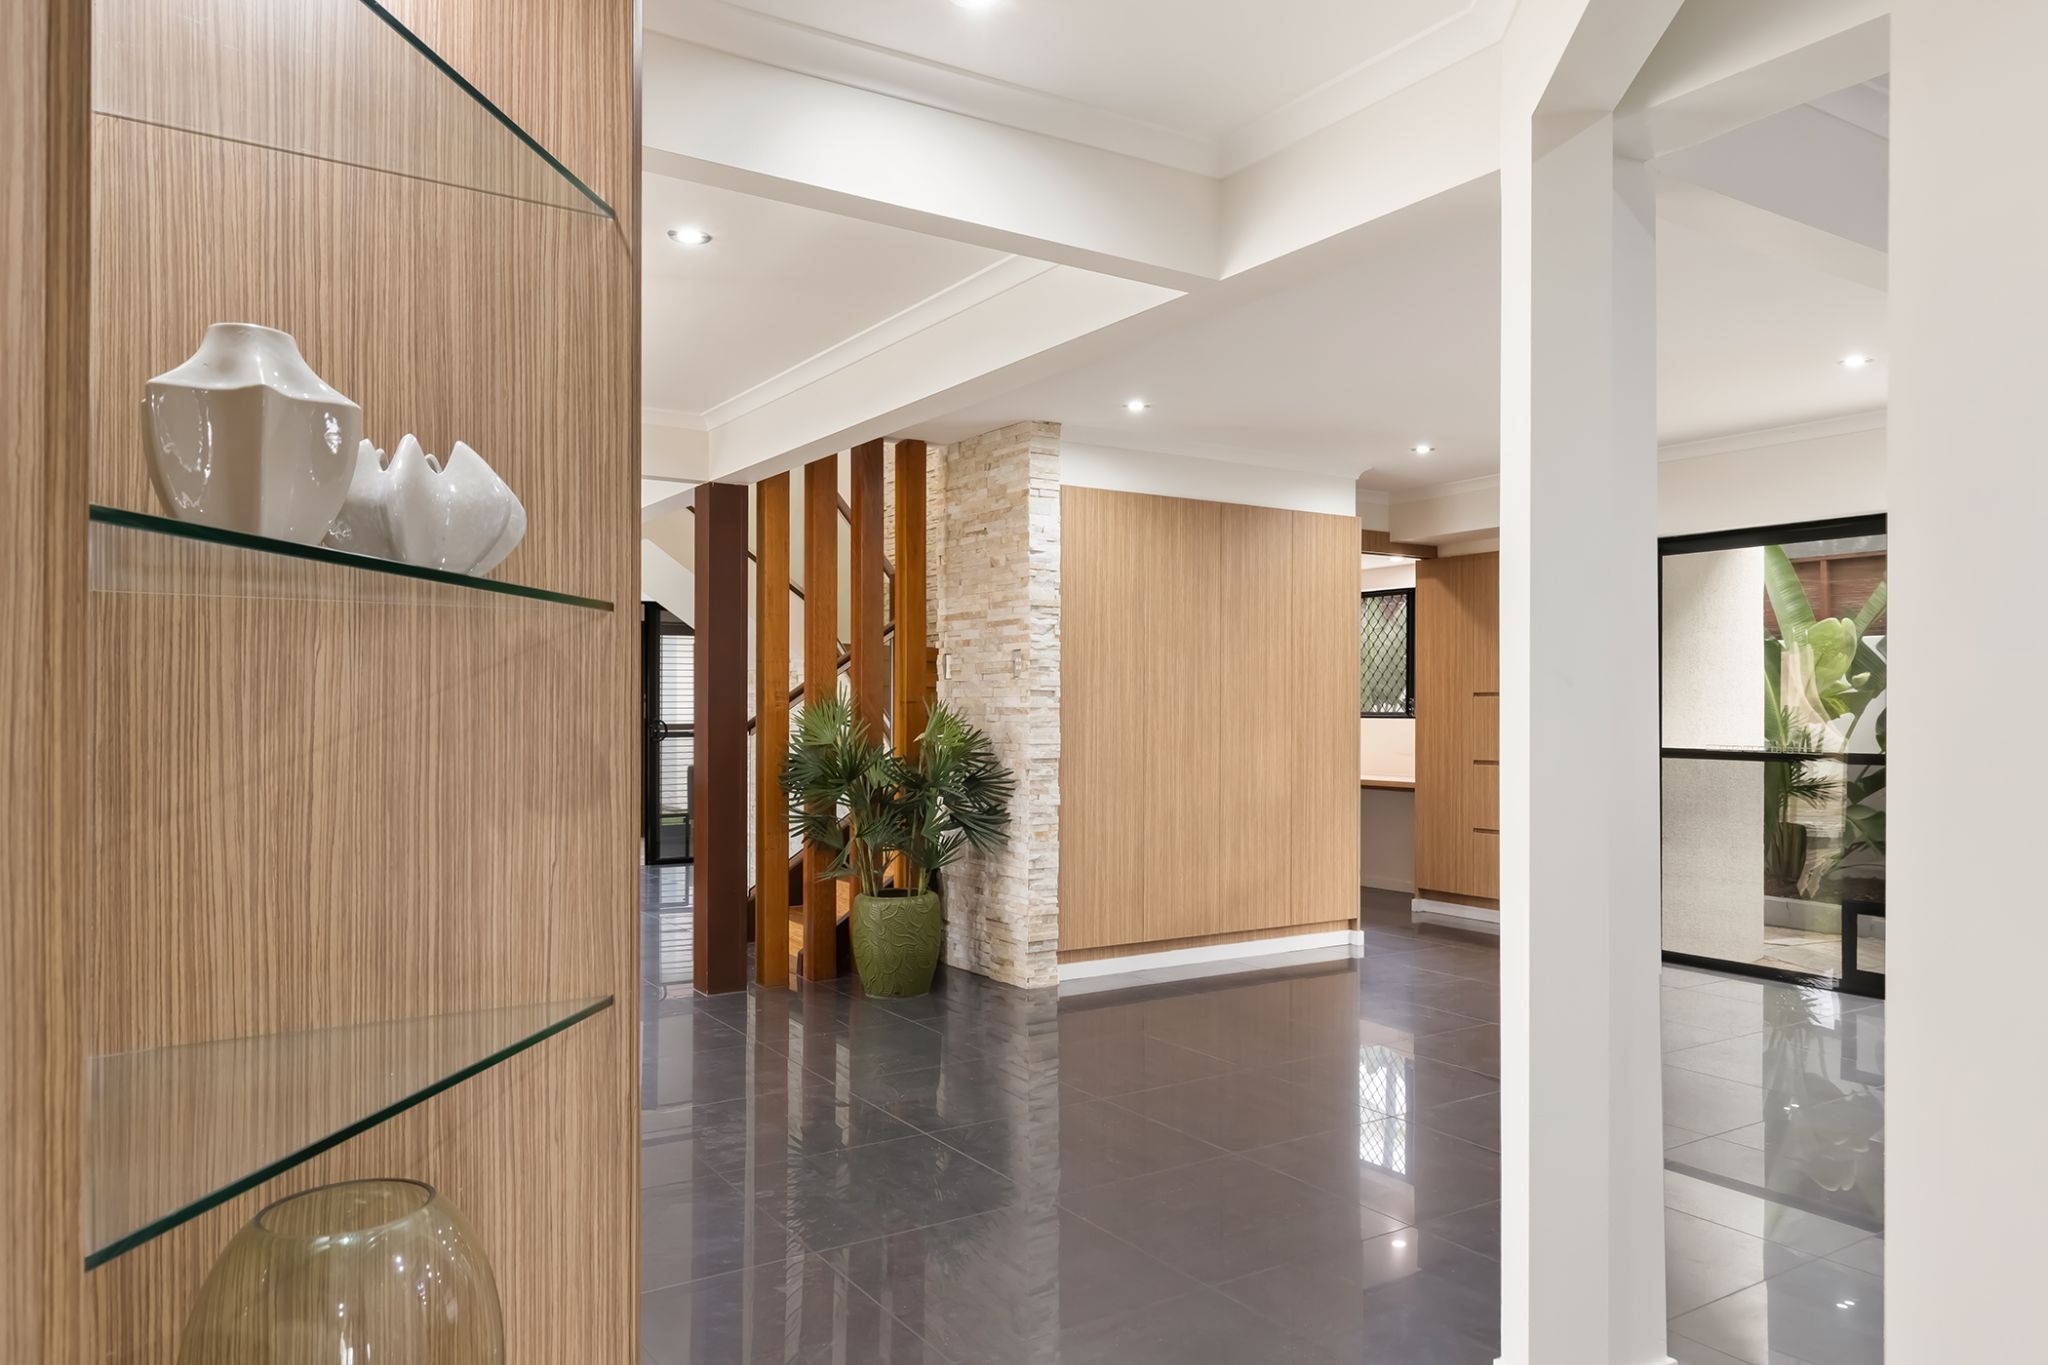
Smart furniture placement improves flow and helps rooms read larger in photos. The right arrangement guides the viewer and highlights the home’s best aspects.
Try these layout principles to improve perception of space:
These small shifts can make rooms feel airier and more purposeful on camera.
More actionable layout guidance:
If renting furniture is part of the plan, choose pieces with simple silhouettes and neutral fabrics that photograph predictably. Test arrangements in daylight and at the photographer’s chosen shoot time to confirm the layout works from multiple angles.
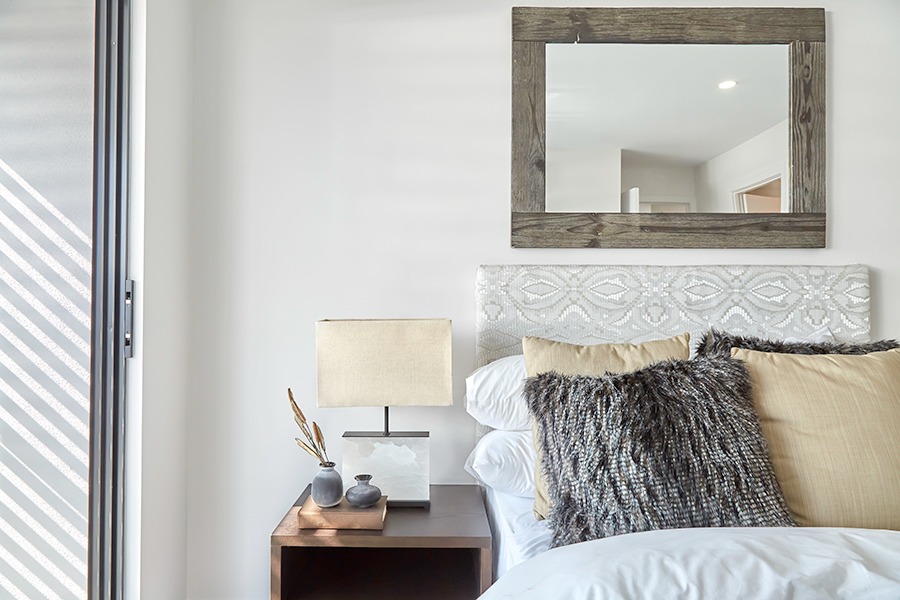
Choose decor that aligns with current buyer preferences but remains broadly appealing. Here are styles that photograph well:
Match the decor to the property and the likely buyer profile for the best photographic results.
Decor selection advice:
When staging across multiple properties or rooms, maintain a consistent approach that respects the home’s architecture and the neighbourhood’s buyer expectations. Too many divergent styles inside a single listing can confuse viewers and reduce perceived cohesion in the images.
Virtual staging offers a flexible, affordable way to present a property’s potential — especially when physical staging isn’t practical. It’s a useful tool to test layouts and styles before committing to real furniture.
Virtual staging brings practical advantages for listing preparation:
For many sellers, virtual staging is a fast, budget-friendly way to elevate listing images.
When using virtual staging, follow these quality-control steps:
Because virtual staging removes the logistics of moving and styling physical items, it cuts both time and expense. Edits are fast to apply and simple to update, letting you respond quickly to market feedback.
Virtual staging also enables A/B testing of different styles: agents can trial a modern, minimalist look and a warmer, traditional view to see which generates more buyer interest online. Use that insight to guide any later physical staging decisions or targeted marketing efforts.
Local market habits matter. In Brisbane, buyers often value light, open layouts and outdoor living — so staging should amplify those qualities.
Brisbane buyers increasingly favour contemporary, flexible spaces: open-plan living, indoor-outdoor connections and low-maintenance finishes rank highly. Staging that emphasizes flow and outdoor appeal will resonate.
Because outdoor living is a strong selling point in Brisbane, ensure outdoor areas are presented as usable rooms: clear away garden clutter, add seating that suits the scale of the space, and stage dining or lounging spots to suggest functionality. Even small balconies benefit from a bistro set or a couple of comfortable chairs.
Adapt staging to local tastes with a few targeted moves:
Aligning staging with what local buyers expect increases interest and improves photo performance.
Additional local considerations:
Working with a staging pro brings experienced eyes and efficient solutions. They can prioritize changes that move the needle in photos and on the market.
Staging experts recommend targeted updates — furniture swaps, color tweaks and lighting fixes — that make the property photograph better and appeal to buyers’ tastes.
A consultant will often audit the property, provide a room-by-room staging plan and suggest low-cost interventions that improve photographability. Their guidance reduces time wasted on non-essential changes and helps align the physical presentation with the photographer’s approach.
Clear goals and open communication make the partnership productive. Share your target buyer profile, timeline and budget, then let the professionals propose focused changes that photograph well.
Practical collaboration tips:
When budgets are limited, ask for a prioritised list from the stager: the top three changes that will make the most photographic impact are usually worth the investment.
Sellers often have the same practical questions about staging. Below are answers to the most common concerns to help you plan confidently.
Staging costs vary by scope, but many sellers see it as worth the spend. Typical full staging ranges from about $1,500 to $3,000 AUD depending on home size and services. Staged homes frequently sell faster and can achieve higher offers, making staging a smart investment in many cases.
Consider a cost-benefit approach: for some properties, simple styling and a professional clean can produce the majority of visual improvements at a fraction of full staging costs. Ask the stager for estimated returns or case studies they’ve achieved on similar properties to guide your decision.
Neutral color schemes photograph consistently well and appeal to the widest pool of buyers. Pair neutrals with a few on-trend accents — modern minimalism or coastal touches work particularly well in many markets.
Colour advice in practice:
Virtual staging digitally adds furniture and decor to photos, while traditional staging involves physically furnishing and styling the space. Virtual staging is usually faster and less expensive; traditional staging gives buyers a real, walk-through experience. Each approach has its place depending on budget, timing and the property’s needs.
Keep decor neutral and clutter-free, remove strongly personal items, and use flexible furniture arrangements that show the home’s purpose without overwhelming it. Incorporating popular, timeless design touches helps appeal to a broader audience.
Avoid over-cluttering, using overly bold colors, and neglecting lighting. Personal items left out can distract buyers, and poor lighting makes rooms look smaller and less inviting. Focus on clean, well-lit spaces that highlight the home’s best features.
Curb appeal is vital: it’s the first impression online and in-person. Simple updates — tidy landscaping, a fresh coat of paint, and clean paths — dramatically improve exterior shots and entice buyers to look inside.
Furniture scale matters. Oversized pieces can make rooms feel cramped; appropriately scaled furniture creates flow and shows usable space. Choose pieces that match the room’s proportions and leave clear pathways.
Accessories should add warmth and personality without cluttering. Use a few well-chosen items — cushions, art, plants — to layer texture and color while keeping surfaces tidy. The goal is a polished, lived-in look that still feels neutral.
Stage outdoor areas as extensions of living space: clean decks and patios, add seating and soft lighting, and use potted plants to create a welcoming scene. Showcasing outdoor usability is especially effective in climates where alfresco living is valued.
When preparing outdoor shots, pick a time of day with flattering light and check that outdoor furniture is clean and positioned to show how the area can be used. Small details — a folded throw, a place setting or a simple cluster of pots — help buyers connect emotionally to the space while keeping the focus on functionality and scale.
Understanding the various photography services available for real estate can help sellers choose the best options to showcase their properties effectively. Below is a list of key services that enhance property listings through professional imagery: