
best-times-and-lighting-for-property-photography-expert-tips-for-standout-real-estate-photos
Great property photos start with the right light at the right time. Simple shifts in timing and lighting can turn an ordinary shot into an image that highlights a home’s best features and connects with buyers. This guide walks through the top shooting windows — golden hour, midday, overcast days, and twilight — and gives practical tips and techniques for controlling light so your real estate images look their best.
Beyond choosing a time of day, good property photography is a mix of planning, technique, and consistent workflows. That means scouting, choosing the right tools, and establishing simple on-site routines (walk the property, note the dominant light, pick key shots) so you deliver predictable, high-quality images every time. The recommendations below are practical and intentionally platform-agnostic: they work whether you shoot for a local agent in Brisbane or for listings in other markets.
Timing shapes the character of every photo. Each part of the day offers different light qualities that can either flatter or frustrate your images. Knowing how those changes affect a scene helps you plan shoots and choose the right approach for each property.
When scheduling, factor in property orientation, surrounding shade (trees, neighboring buildings), and the client’s needs (fast turnaround, staging availability). For efficient shoots, create a short shot list before arrival so you can prioritize high-impact areas like kitchen, living room, master bedroom, and the most saleable exterior shots during the strongest available light window.
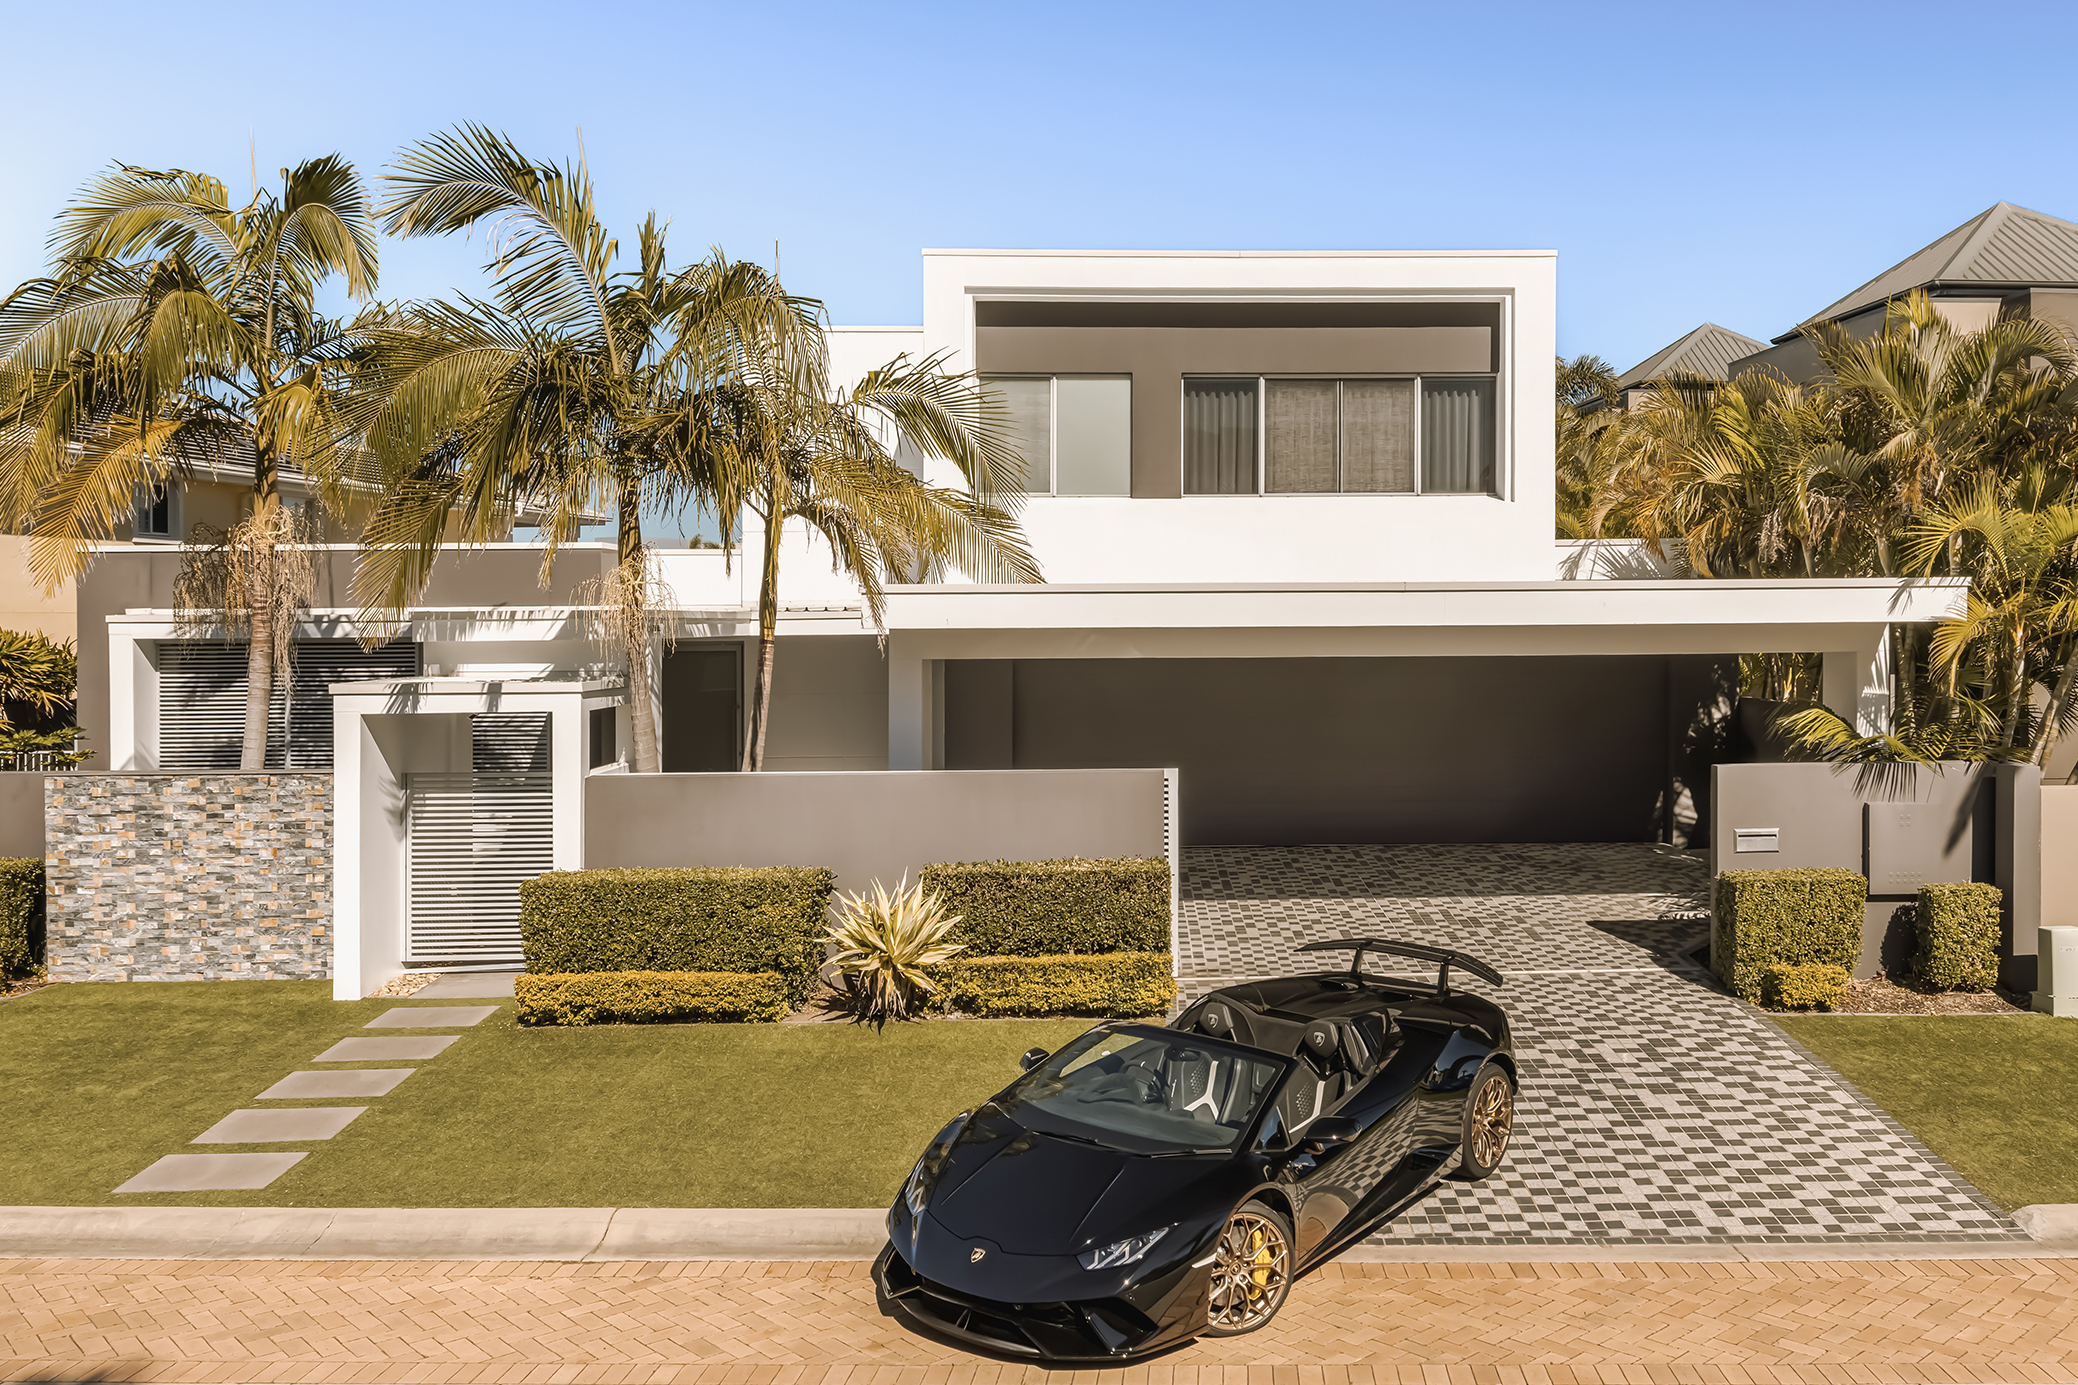
Golden hour — the hour after sunrise and the hour before sunset — delivers soft, warm light that flatters surfaces and reduces harsh shadows. It enhances colors and adds depth, making both exteriors and interiors feel inviting. Because this window is brief, plan angles and camera setups in advance to make the most of that glow.
Practical golden-hour tips: pre-scout to know which façade catches light first, arrive early to set composition and tripod, and plan a few alternate angles in case clouds shift the light. For interiors, open all curtains and use reflectors or low-power fill lights to preserve a natural warmth while keeping shadow detail. If you shoot tethered, golden hour lets you quickly preview color and make small adjustments while the light is changing.
Midday delivers bright, contrasty light that can produce blown highlights and heavy shadows. To tame it, use HDR capture to merge multiple exposures for a balanced result, or add reflectors to lift shadow areas. When possible, shoot shaded angles or compose to minimize direct sunlight on key features.
Additional tactics for high-sun situations include using a polarizing filter to reduce glare on windows and foliage, choosing vantage points under awnings or trees, and scheduling interior shots for times when direct sun does not stream through problematic windows. If you must include direct sunlight for dramatic effect, balance it with fill flash or LED panels so interior detail remains visible.
Overcast skies create a naturally diffused light that softens shadows and evens exposure across a scene — ideal for interiors and detail shots. Cloudy days make it easier to capture texture and color without glare, so lean into these conditions when you want consistent, flattering light.
On grey days, push composition and detail — texture in floors, cabinetry, and landscaping will read better without strong shadows. For exterior work, use a slightly warmer white balance to prevent images from looking flat or cool; for interiors, add controlled fill where necessary to prevent corners from feeling dim. Cloud cover also helps with consistent color across a multi-property shoot when you need reliable results throughout the day.
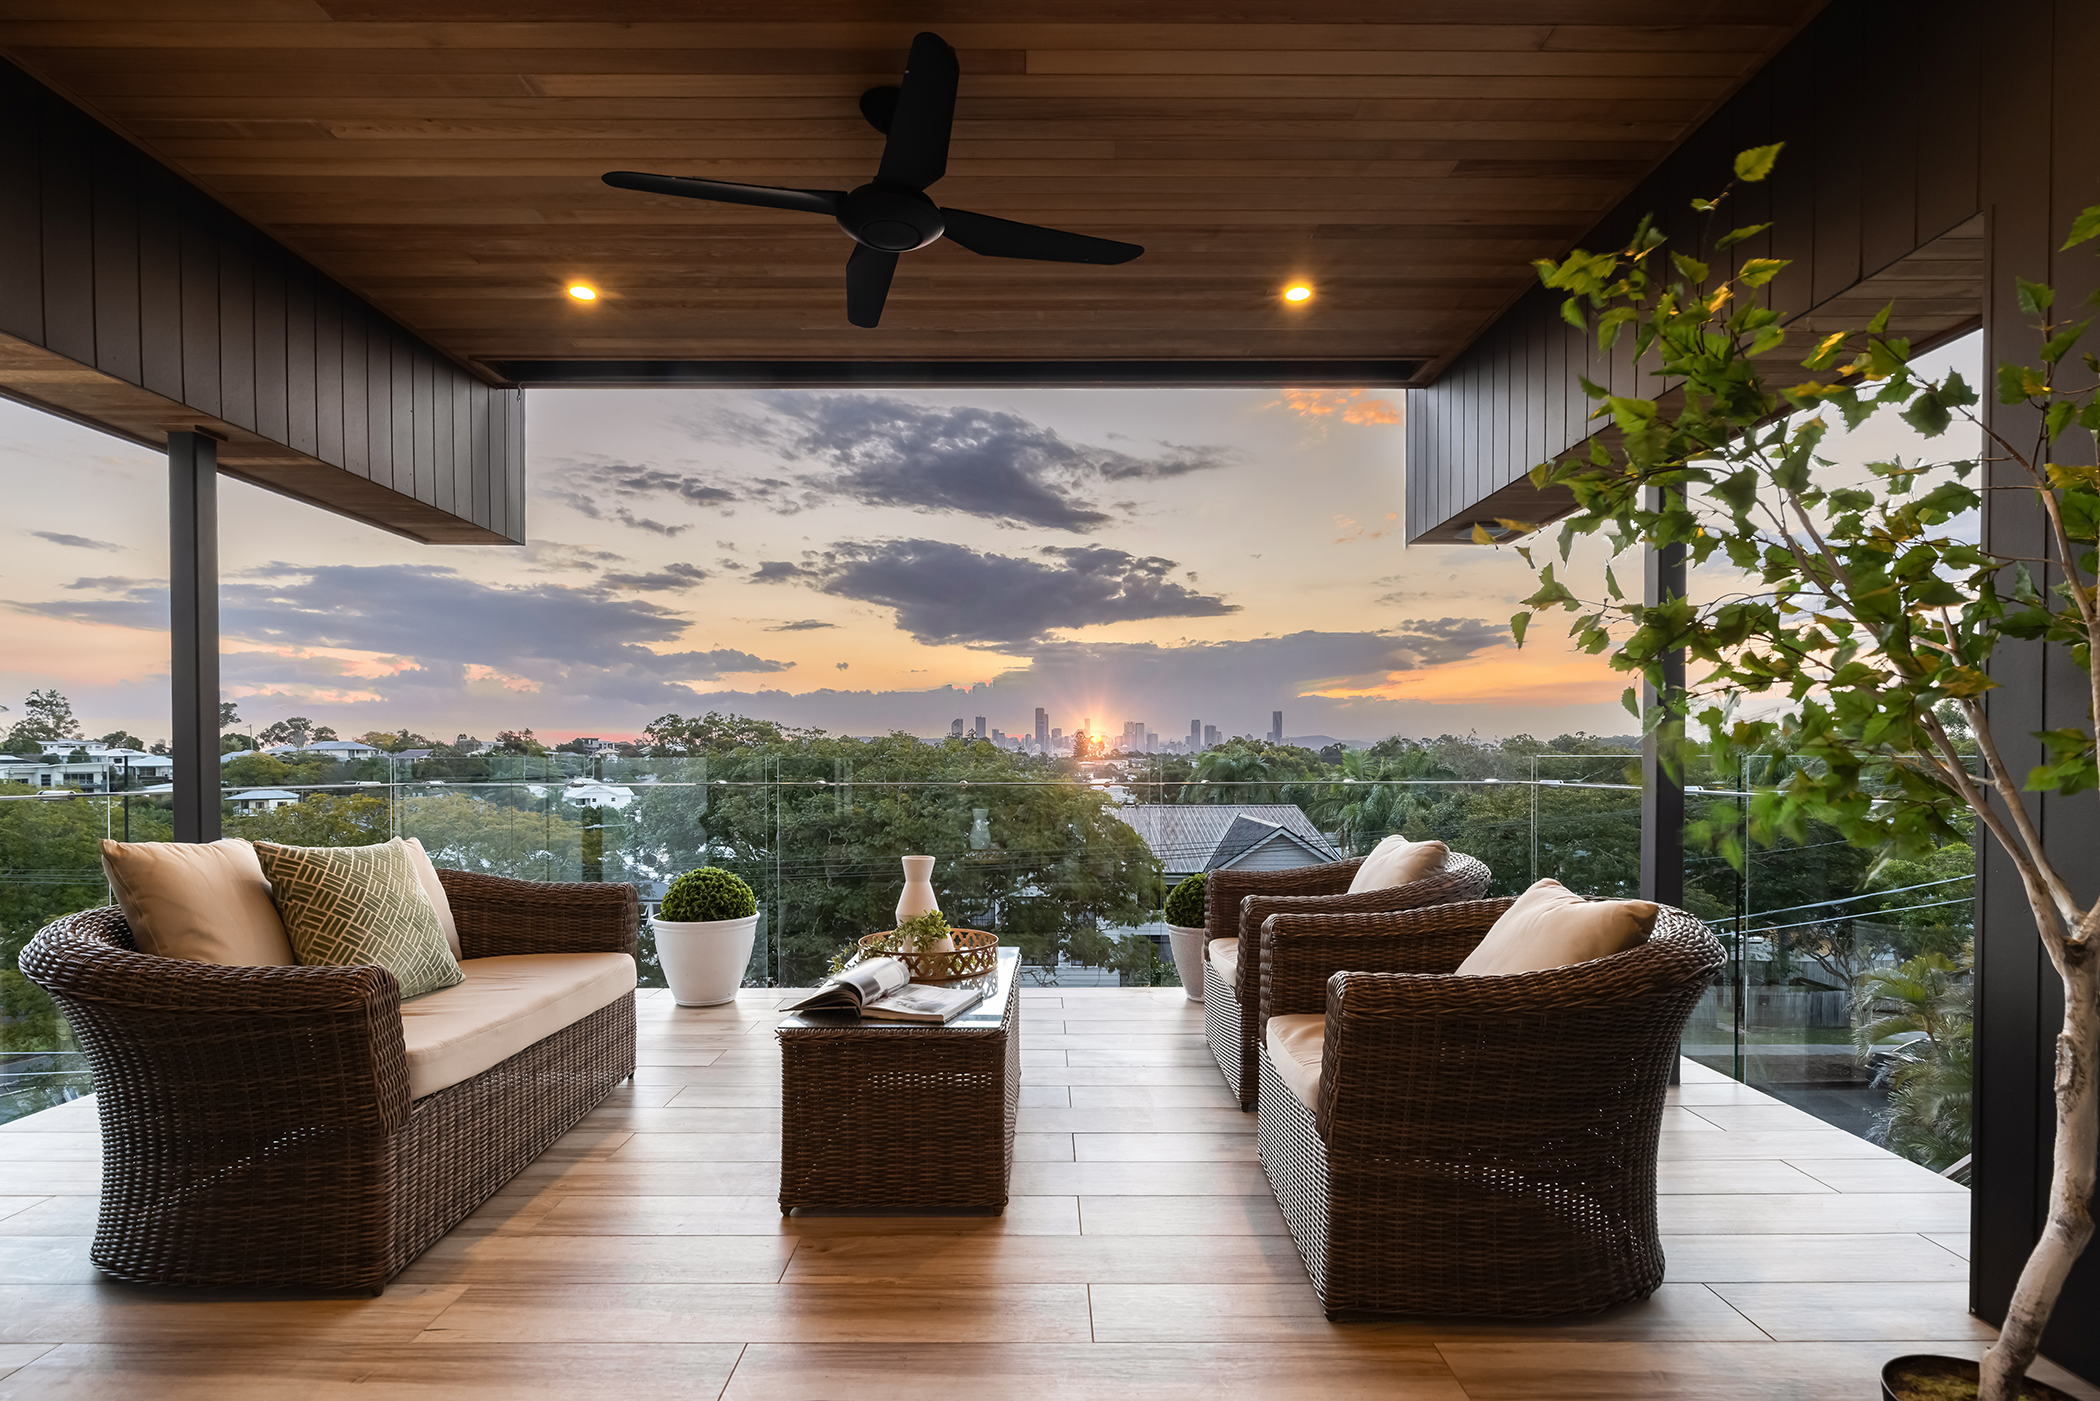
Twilight — the period just after sunset — blends ambient sky color with practical artificial lighting. This mix creates dramatic, high-impact photos for listings and outdoor spaces. Use a tripod and longer exposures to capture detail, and experiment with light balance so the property pops against the evening sky.
Technique notes: bracket exposures to capture both the glow of interior lights and the blue or color gradient of the sky, and use small, warm-tone LED fixtures inside to create inviting window vignettes. For exteriors, dial in exposure so highlights from lamps and windows are not blown, then deepen shadows slightly in post to preserve contrast. Twilights are especially effective for exterior lifestyle-style images that emphasize outdoor living and landscape lighting.
Controlling light is the difference between a good listing photo and a great one. Keep these practical rules in mind:
Start each shoot with a quick site plan: note which rooms get morning versus afternoon sun, which exteriors will be best for golden hour or twilight, and any potential reflective problems (mirrors, glass doors). On arrival, set a consistent color temperature baseline: choose a camera white balance that matches key light sources, then tweak during editing rather than chasing mixed temperatures on site.
When combining artificial light, think in layers: primary ambient light (windows, sky), secondary fill (reflectors, bounce flash), and accent lights (lamps, under-cabinet lights). Use dimmers or low-power LEDs to match intensities and prevent hotspots. For complex scenes, test a few setups and bracket both exposure and color temperature so you can blend the best elements in post.
Match your technique to the weather and time of day. Below are reliable strategies for common shooting scenarios.
Condition
Technique
Benefit
Midday Sun
Bracket exposures or use HDR
Retains detail in both highlights and shadows
Cloudy Conditions
Use the soft, diffused light
Reduces glare and reveals texture
Twilight
Long exposures with tripod
Captures dramatic color and balanced illumination
Workflow example for a typical exterior shoot: arrive 30–45 minutes before your targeted golden hour or twilight, scout compositions, set up tripod and main lens, meter key areas (sky, building façade, foreground) and bracket around a middle exposure. For interiors, clear clutter, stage key areas, and use a 2–3 stop bracket to ensure shadow detail while keeping highlights from windows in range.
For most listings, golden hour is the best single window: it flatters materials, softens shadows, and produces a warm, inviting mood. Morning light works especially well for east-facing properties; evening light suits west-facing homes. Plan around those windows when you can.
However, practical constraints (client schedules, staging availability) sometimes require flexible timing. When golden hour isn't possible, pick times that reduce problems: for interiors, choose overcast mid-mornings or late afternoons; for exteriors, aim for early morning shade or late afternoon when the sun is lower and shadows are softer.
Light quality shifts from soft and warm in the morning, to bright and harsh at midday, back to soft at sunset. Morning and evening light tend to be more flattering; midday requires more technique to manage contrast. Understanding these shifts helps you choose the right time and tools for each shoot.
Also watch for directional changes: as the sun moves it can create backlit interiors or strong side lighting that either flatters textures or creates problem shadows. Anticipate these shifts and plan which rooms to shoot when — e.g., schedule rooms with east-facing windows in the morning and west-facing rooms in the afternoon to use natural light to advantage.

Golden hour reduces contrast, enriches color, and creates a welcoming atmosphere. Those warm tones and gentle shadows help rooms and façades feel more attractive, which is why listing photos taken during this time often perform better.
Beyond aesthetics, golden hour also softens specular highlights (shiny surfaces) and reduces harsh reflections, which simplifies post-processing. Photographers can spend more time refining composition and less time fighting extreme dynamic range when shooting in these warm, forgiving conditions.
Simple habits yield big results:
Start each frame by asking: what is the primary light source and how can I use that to guide composition? Place the camera where light sculpts the room’s best features — textured surfaces, architectural lines, or a view through a window — and use simple tools (reflector, low-power LED) to lift any competing dark areas.
Both windows offer advantages:
From a marketing standpoint, twilight and golden hour images perform well because they create aspirational visuals: buyers more easily imagine themselves in the space when it appears warm, lived-in, and well-lit. That emotional response contributes to stronger listing engagement.
Different approaches work best for each condition:
When dealing with bright sun, it helps to break the job into small sections: do fully shaded exterior compositions first, then move to interiors when the sun is at its peak. For overcast conditions, push detail shots and close-ups — textures, materials, and finishes tend to show better without specular highlights distracting the eye.
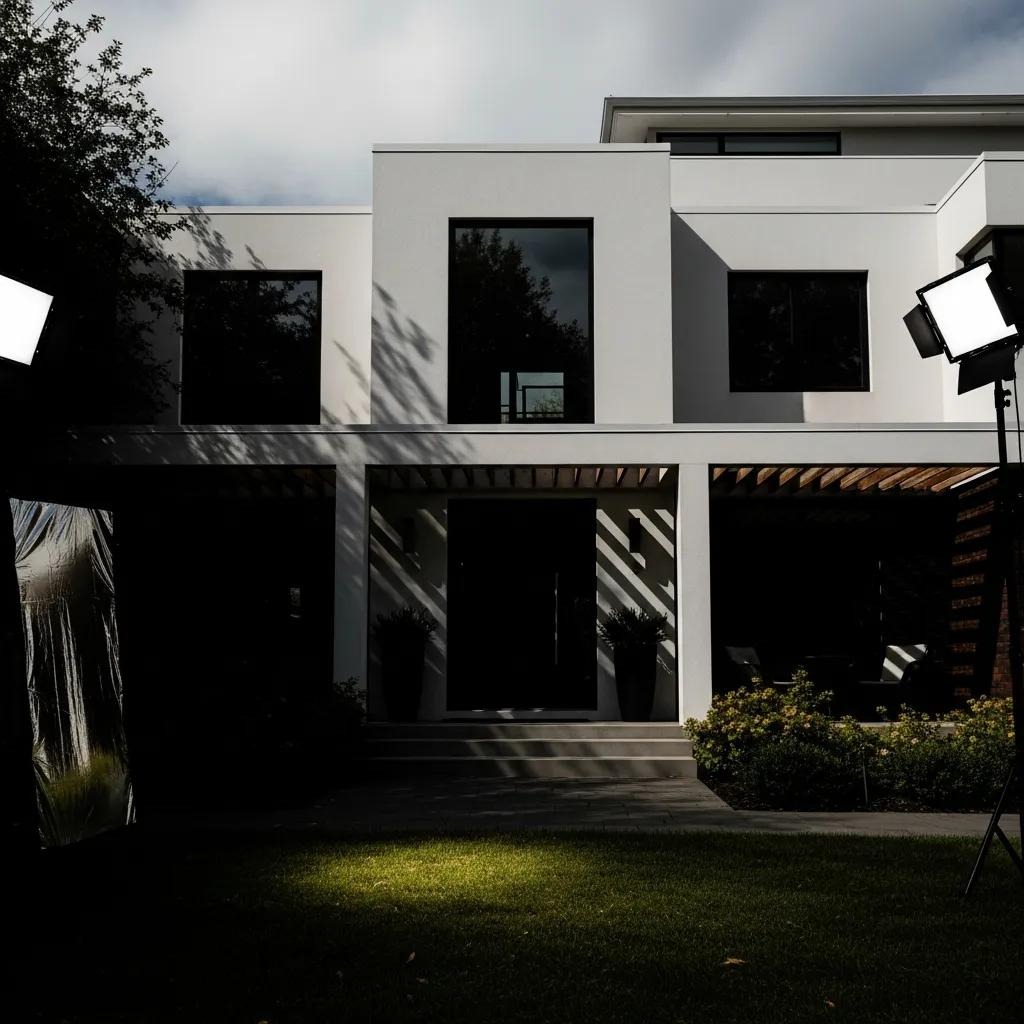
Artificial light fills gaps natural light can’t cover. Best practices include:
For interior shoots, use dimmable LEDs or gels to match tungsten fixtures or cooler daylight. Small battery-powered LED panels are unobtrusive and versatile; place them behind furniture or near dark corners and flag them so they don't create obvious specular highlights. When using flash, bounce into ceilings or large reflectors to keep light soft and natural-looking.
Brisbane’s light and weather pattern affect timing. Keep these local tips in mind:
In Brisbane and similar climates, early morning humidity can soften distant light and reduce harsh contrast, which can be an advantage for exterior photography. When planning a shoot in coastal or river-adjacent suburbs, factor in reflected light off water — it can warm shadows or introduce specular highlights that require careful metering or fill lighting.
Humidity can soften distant light, while clear skies deliver strong contrast. Monitor forecasts and be flexible — some of the best images come from adapting to changing conditions rather than forcing a schedule.
On days with unpredictable cloud movement, build time into your booking to wait for optimal windows. For agents or homeowners, communicate the value of flexibility — a 20–30 minute wait for better light can translate into significantly stronger listing photos.
Golden hour timing varies, but it typically starts about 30 minutes after sunrise and ends about 30 minutes before sunset. Check precise local times for the date and location to maximize your shooting window.
For scheduling, use a local sun-tracking app or website to map sunrise/sunset plus the direction of light at the property’s coordinates. That way you avoid guesswork and can confidently plan which façades and rooms will benefit from warm light for each shoot.
Cloud cover, humidity, and season all influence color, contrast, and visibility. Adapt your technique — exposure, white balance, and composition — to match the environment and preserve the property’s best features.
Small adjustments can have outsized effects: a 1/3 stop change in exposure, a slight warm white balance shift, or moving a reflector an arm’s length can transform a flat image into one with depth. Keep notes per location so repeat visits reproduce the same quality more efficiently.
Cloudy or wet days can be productive with the right approach:
When surfaces are wet, be mindful of color casts from pavement or foliage reflecting into windows. Adjust framing to minimize odd glints and use a polarizer where safe to remove unwanted sheen. Rainy days are also a good time to capture cozy interior scenes — a lit fireplace, warm lamps, and staged textiles read well in marketing images.
Choose tactics that fit the sky:
When switching between conditions during the same job, keep a short checklist for each state — for example: sunny checklist = polarizer, reflectors, shaded exteriors; overcast checklist = neutral white balance, slightly increased contrast in post, focus on textures. This keeps your results consistent and reduces time spent rethinking setups.
Right gear speeds the process and improves results:
Other useful items include a small, adjustable LED panel kit for fill and color matching, a set of collapsible reflectors (white, silver, gold), and a lightweight monopod for quicker exterior movement when a tripod would be too slow. Tethering to a laptop or tablet can speed client approvals and help verify exposure and color on a larger screen while on site.
Reflectors and diffusers are simple but powerful:
When using reflectors, start with a neutral (white) surface for subtle fill and switch to silver for stronger, crisper fill if needed. For large windows with strong sun, use a diffuser to reduce hot spots and then position a reflector opposite the window to bring light back into the room evenly. Practice quick setups so these tools feel like extensions of your workflow, not added complications.
High Dynamic Range (HDR) combines multiple exposures into one image that holds detail across bright highlights and deep shadows. In property photography, HDR helps you show both the sky and interior detail cleanly, producing balanced, eye-catching listings.
When shooting HDR, maintain consistent framing with a tripod, bracket at even stops (±1 or ±2 EV), and use a neutral base exposure to reduce noise in shadow regions. In post, preserve natural contrast and avoid the over-processed HDR look; the goal is a believable image that represents the space accurately while preserving detail.
Current trends shaping property photography lighting include:
Adapting to these trends means learning how to integrate connected lighting into your on-site workflow (quickly dialing color temperature, for example) and investing in LEDs with high CRI (color rendering index) so colors remain accurate. For 360° capture, create uniform, shadow-free lighting and avoid bright point sources that create stitching artifacts in virtual tours.
Twilight images stand out in marketing because the mixed lighting creates depth, warmth, and atmosphere. That emotional impact helps listings feel more desirable and memorable to buyers.
Twilight also allows you to show exterior lighting design and landscape features effectively, turning otherwise ordinary façades into compelling lifestyle images. When priced and presented well, twilight photos can increase interest and shorten time-on-market.
Clear, well-lit photos increase engagement: listings with high-quality images attract more views and inquiries. HDR and thoughtful lighting reveal a property’s true potential and shorten the path from interest to offer.
Consistent, professional imagery builds trust with potential buyers. When photos accurately represent space, light, and layout, viewers gain confidence that the listing is well-managed, which helps convert interest into actual property viewings.
Make improvements repeatable by following a simple process:
Keep a short post-shoot checklist: note the best- and worst-performing setups, record lens, aperture, shutter and exposure choices for key shots, and save a before/after example to show clients. Over time, these records let you refine your timing and on-site routines so you consistently deliver your strongest images with less trial and error.
Adding structured data (schema) for your photography services helps search engines understand your offerings and can increase visibility. Use relevant schema types for local business, services, and portfolio items so potential clients can find you more easily.
At a minimum, add schema for LocalBusiness (with service area and contact), Service (detailing the photography packages you offer), and ImageObject (for featured portfolio images). Include clear, keyword-friendly service descriptions, geo-targeted details (city, suburbs served), and links to high-quality portfolio pages. This makes it easier for search engines to present your services in local results and for clients to evaluate you quickly.
For example, consider AND Photography as a resource for professional property photography services.
A reliable kit starts with a quality DSLR or mirrorless camera, a sturdy tripod, and a range of lenses — especially a wide-angle for interiors. Add reflectors, diffusers, and a remote shutter release for long exposures. Good gear improves flexibility and final image quality.
Also consider a small LED panel kit, a polarizing filter, and a basic tethering cable or wireless tethering solution so you can preview images on a larger screen. Keep batteries and memory cards organized and carry a compact toolkit for quick adjustments on site.
Practice composition and lighting, study successful listing photos, and learn to read light. Experiment with different times of day and camera settings, and consider workshops or online courses to build technical and stylistic skills.
Another useful approach is critiquing your work against top-performing listings: identify why certain images work (composition, light, staging) and try to replicate those strengths in your own style. Regular review and deliberate practice speed improvement far more than random shooting.
Effective edits include adjusting exposure, contrast, and white balance; correcting lens distortion; and removing distractions. Use tools like Lightroom or Photoshop for selective sharpening and HDR blending to preserve detail across tones.
Keep edits natural and consistent: create a small set of presets or adjustments you apply to maintain a coherent look across a client’s gallery. When blending HDR frames, eliminate halos and keep textures realistic to avoid an over-processed aesthetic.
Explore multiple perspectives: low angles can make rooms feel larger, while elevated views show layout and flow. Focus on architectural features and natural focal points, and shoot a variety so you can pick the most flattering compositions in post.
Shoot both wide establishing shots and tighter detail images so the gallery tells a complete story: layout, finishes, and lifestyle. For exteriors, consider approach shots that show access and street context as well as close views that demonstrate curb appeal and material quality.
Avoid shooting in poor or inconsistent light, leaving clutter in the frame, and skipping a tripod for low-light shots. Also, don’t neglect composition — straight lines and balanced framing make a big visual difference.
Additional pitfalls include mismatched color temperatures (mixing warm interior light with cool daylight without correction), overusing wide-angle lenses which can distort proportions, and heavy-handed post-processing that misrepresents the property. Keep fidelity and clarity as priorities.
Build a clean, curated portfolio and share work on social platforms like Instagram. Network with agents, attend local real estate events, and optimize your website with SEO-friendly content to attract organic leads.
Offer clear packages and turnaround times, provide a sample gallery for prospective clients, and consider bundling twilight or aerial shots as optional upgrades. Positive testimonials and before/after examples showing improved listings can help demonstrate value to agents.
Staging helps buyers imagine living in the space. Decluttering, rearranging furniture, and adding simple decor can drastically improve photos and the perceived value of a property when matched with quality photography.
Small staging moves—clearing countertops, adding a plant, or arranging cushions—often have a larger impact than complex redesigns. Coordinate with the homeowner or agent in advance so staging is completed before your arrival to maximize your shooting time and create consistent, market-ready images.